
The Ikea Sniglar Crib Gets an Upgrade

My husband and I just welcomed our second baby, a little girl named Isla into the world this past August and after having my son two and a half years ago, I have been beyond excited to pick out all of the girlie things this time around. With him, we used a gorgeous black metal framed crib and while there was nothing wrong with it, I knew I wanted something different for our girl - a crib that is natural looking, one that softer and warmer in tone.
I looked around at available cribs on the market. Facebook marketplace wasn’t offering much in my local area, but I did have good luck selling my son’s crib for a decent price there. Pottery Barn Kids, West Elm and Crate & Barrel all have beautiful options in that acorn/dark honey color, but prices are upwards of $800. I couldn’t justify spending that much on a crib.

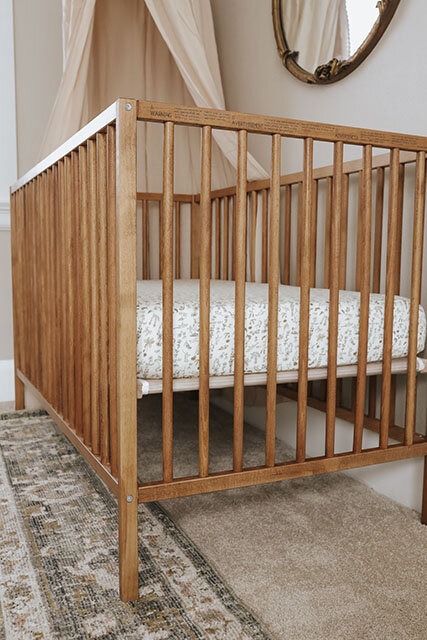
One day while perusing Ikea I came across their Sniglar crib. It is a gorgeous solid beech wood crib that appears unfinished. You have probably seen it because its scandinavian look is wildly popular on social media and I’ve even noticed a lot of baby brands use it in their marketing. And while I love the look of it as is, I wondered if it could be stained to resemble some of these pricier acorn colored cribs I was seeing from other retailers.
The Sniglar comes to $83 with tax, so I didn’t feel like I had too much to lose by trying to modify it. I figured I could try a few stains on one of the under sides of the crib and if it didn’t look great, no one would know the difference. At worst I would keep the crib as is, which was also fine by me because the crib is stunning on its own.
Because the sniglar is unfinished beech wood, there is zero prep work that goes into this little project. That was such a relief and nice break for me because normally there’s at least some sort of sanding or cleaning before I can stain or paint something. I did have to put in some thought and work into figuring out which stain was going to work best for the look I was going for. I shared all of the trial and error of that over on an Instagram highlight if you’re interested in viewing all of the other stains I tried and swatched.


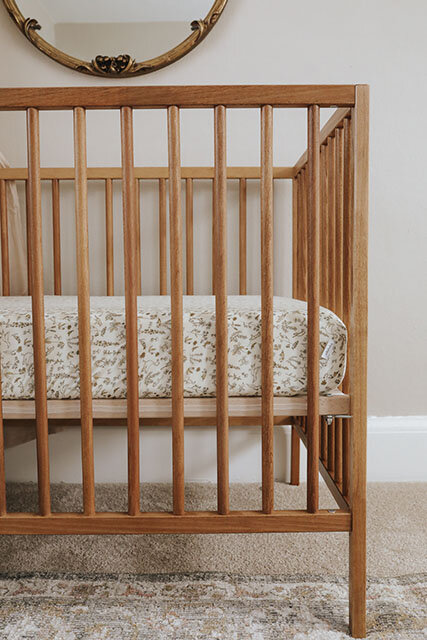
In the end I decided to use Minwax’s Golden Oak oil stain and I have to say it was exactly what I wanted from the beginning. No overpowering red or orange tones, not overly yellow either. Just a perfectly natural, warm wood tone. And surprisingly, the crib took the stain very well. I was worried because my swatches on the under side weren’t perfect, but once I started applying the stain I knew it was going to look beautiful.
From what I read about beech wood, it isn’t supposed to take a stain very well or evenly, but I have to disagree on this one! The stain came out very even. Especially for not having sanded anything prior. You can see the contrast between the unfinished beech wood and the stained beech wood below.


If you are planning to attempt this crib makeover yourself, here’s a little list of the materials I used.
Materials
Everything totaled up cost less than $100 and I think that is such a steal.


Typically I would apply a topcoat to an item of furniture using a brush, but because this crib has an endless number of spindles and I wanted to avoid drip marks, I decided to use a spray polyurethane. Minwax makes a fast dry spray Polyurethane and it made this project almost too quick and easy. I applied two coats just to be sure I had full coverage and didn’t miss a spot.
Because this is a crib that I will be using for our daughter, I wanted to take every precaution to ensure I was using safe chemicals and the correct process for this project. From what I researched, Minwax’s stains are safe to use on furniture exposed to children as long as they are sealed with an appropriate top coat. And the polyurethane top coat I used is appropriate to use on furniture exposed to children as long as it has time to cure before use. We are letting this crib cure for almost six months since we use a snoo during for the first six months of our daughter’s life, but the usual recommended cure time is only 30 days.
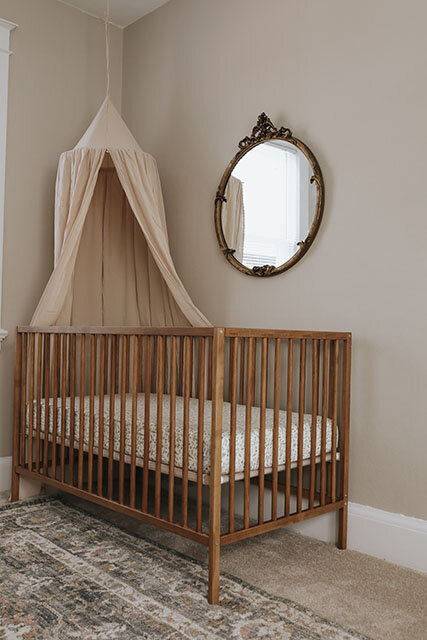

I still can’t get over the low price of this crib. There’s a time to save and a time to splurge. With a crib as good as this one, it’s a time to save. I’m so glad I didn’t have to spend hundreds and hundreds of dollars to get the look in our daughter’s nursery that I wanted. I hope this was helpful.
x Megan
